BK25
Previously, I published BK23 (new rules for Black Knight that I started late in 2023). Now, I’ve revamped a couple of concepts and added a bunch more light shows and I’m calling this latest code BK25. After a quick rundown of the new rules, I’ll talk about all the build details and then present a video of the gameplay.
BK25 Rules

Skill Shot
Skill Shot - loop around into the upper lock (follow the green arrows) for a regular skill shot.
Super Skill Shot - hit flashing target on upper-left drop bank (it will be flashing blue).
Collect Relics (Combos)
Every time the ball travels through the left or right inlane, you’ll hear a church bell signaling the start of a combo chain. Look for lit shots that will continue the chain and keep building your way into the chime sequence. With each extra chime, you’ll build bigger rewards and collect more Relics. Each relic brings a different reward. The game will announce the relic name in Latin.
Right Inlane > Spinner = Hold Bonus X
Right Inlane > Spinner > Left Ramp = Middle Ramp Value Held
Right Inlane > Spinner > Left Ramp > Lock = Double Timers
Right Inlane > Loop = Hold Bonus
Left Inlane > Middle Ramp = Progressive Bonus
Left Inlane > Saucer = Combat Jackpot Increases by 50k
Left Inlane > Saucer > Middle Ramp = Increase Playfield X for 15 seconds
Left Inlane > Saucer > Saucer = Combat Jackpot Increases by 100k
Left Inlane > Right Inlane = Progressive Bonus
Right Inlane > Left Inlane = Progressive Bonus
Left Inlane > Middle Ramp > Lock = 300k first time, then 500k
OMNIA (20 steps) = All Rewards
Combat Modes
Completing any drop bank earns coins (lights loop)
With coins, loop opens portcullis (lights next upper lock)
Single Combat - lock 1 ball and press both magna save buttons for single combat. Complete drops to light death blow. Death blow (saucer) completes single combat parts 1, 2, or 3. Jackpot is increased with each win. Subsequent Single Combat modes require the completion of more drop target banks to light death blow.
Combat à Deux - lock 2nd ball and press both magna save buttons for Combat à Deux (two ball multiball). Complete drops to light jackpot. Collect jackpots at saucer or upper lock. Drops re-light jackpot.
Combat à Trois - lock 3rd ball for Combat à Trois (three ball multiball). After you complete target banks, Jackpots are lit on 6 major shots. Finish all jackpots to light double on upper lock. Multiple balls in upper lock earns super & mega.
King’s Challenges
Complete a drop target bank three times to qualify King’s Challenge.
Saucer or upper lock start KC.
Each stacked KC comes with more time and +1 playfield multiplier.
Award is received at end of timer.
LL Drops - Levitate (hit lower left drops while magnet cycles)
LR Drops - Mêlée (each pop hit increases award)
UL Drops - Joist (hold ball for 2 seconds to qualify center target of all banks)
UR Drops - Perfection (hit only lit bank of drops)
If a King’s Challenge is running when a combat mode starts, the KC timer will be paused and any playfield multiplier will apply to combat jackpots.
How to Get BK25 on your Black Knight
Everything published here is free & open source, meaning you’re only on the hook for parts and labor. Everything here is presented AS IS and WITHOUT ANY WARRANTY; without even the implied warranty of MERCHANTABILITY or FITNESS FOR A PARTICULAR PURPOSE. That said, I hope you enjoy it as much as I do.
Hardware Required
RPU Board (Rev 101 or Rev 102) - follow the instructions to build, upload code, and install on your Black Knight
The Rev 101 is a through-hole board that plugs into the 6802/6808 CPU socket. The Rev 102 is a surface mount version. The only function difference is the Rev 102 has hardware ports for a little OLED display and a WiFi module. Neither the display nor WiFi is supported by this software yet,
The Black Knight code (BK25) is located on GitHub.
Be sure to configure your RPU_Config.h
Set RPU_OS_HARDWARE_REV to 101 or 102
#define RPU_OS_HARDWARE_REV 102
Comment out (put two slashes before the #) the define for RPU_OS_USE_ACCESSORY_LAMP_BOARD if you’re not going to use an ALB board
//#define RPU_OS_USE_ACCESSORY_LAMP_BOARD
Once your board is ready, you can use these instructions to upload the code.
Sound Support (WAV Trigger, SD Card, cable, and speakers)
The audio samples for this game are in a zip file here.
Unpack that audio to an SD card.
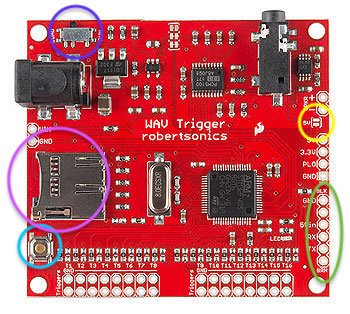
Solder the 5V solder jumper (circled yellow in photo) and put on a 6-pin male header (circled in green in photo).
I connect the WAV trigger to the RPU with a 6-pin cable like this.
Test your WAV Trigger and see this post if you’re having any trouble with getting audio out.
I like the Logitech Z533 speakers for this machine.
Optional Hardware
Accessory Lamp Board (ALB) - instructions for this application below
Playfield Rails
Fancy Ramps
Topper Enclosure
Additional Lighting with ALB
Accessory Lamp Board
For BK25, I added topper lights (pointed at the ceiling), speaker lights, ramp lights, and playfield rails. The code is currently set up for these WS2811 lamps at 20 pixels / m, but it’s simple to reconfigure. I use this wire for lighting projects and I generally use JST-SM connectors.
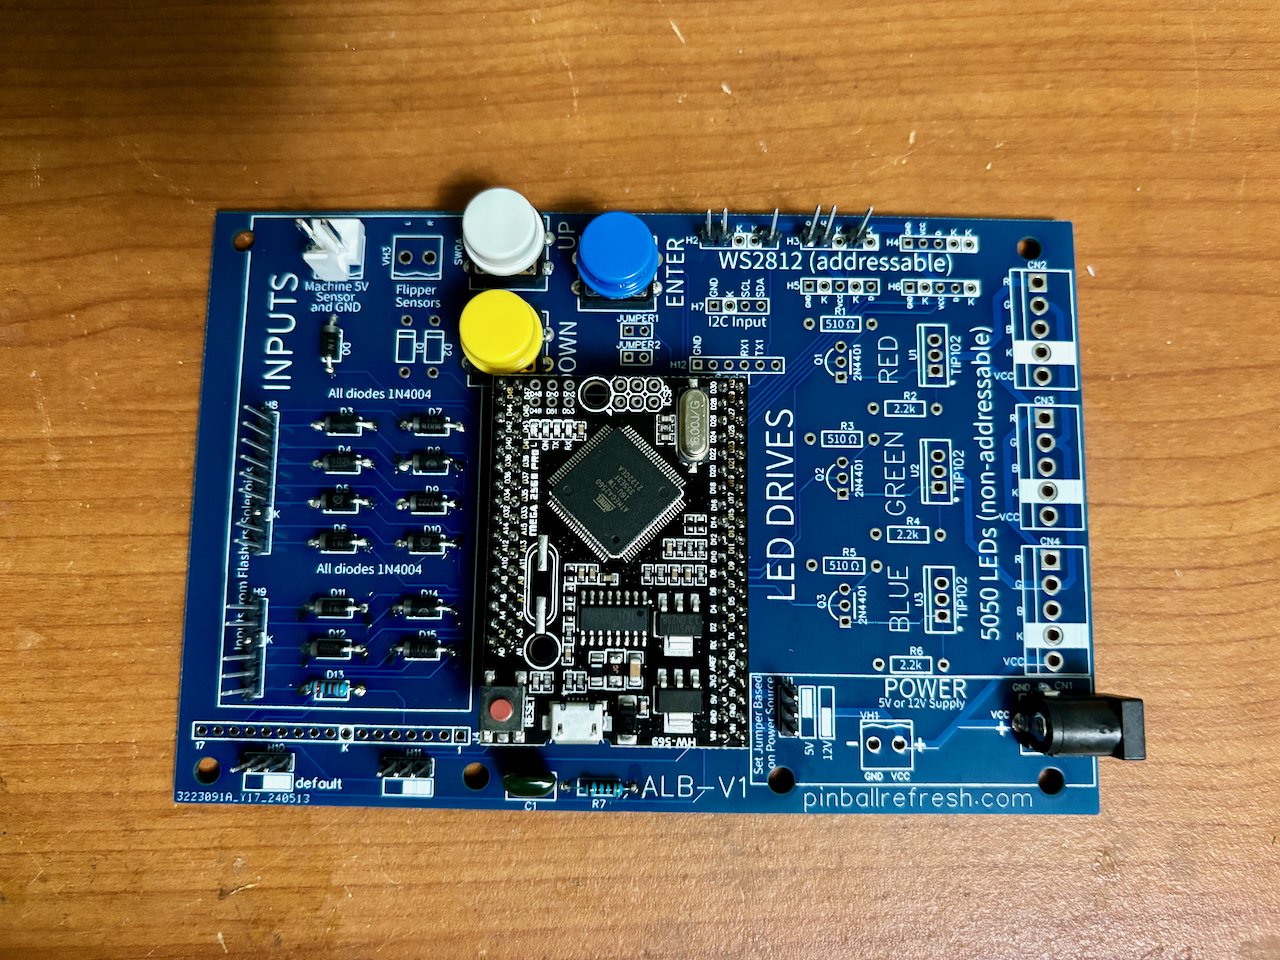
ALB Sections Populated - This is a simple ALB build. You only need the following sections (check here for build instructions):
Power - 12V power with a barrel connector
Arduino - MEGA 2560 Pro
WS2811 Strip LEDS - 20 pixels / meter
i2c connection - I mounted the ALB on the side wall of BK’s head, so I had to make my own 4-pin cable long enough
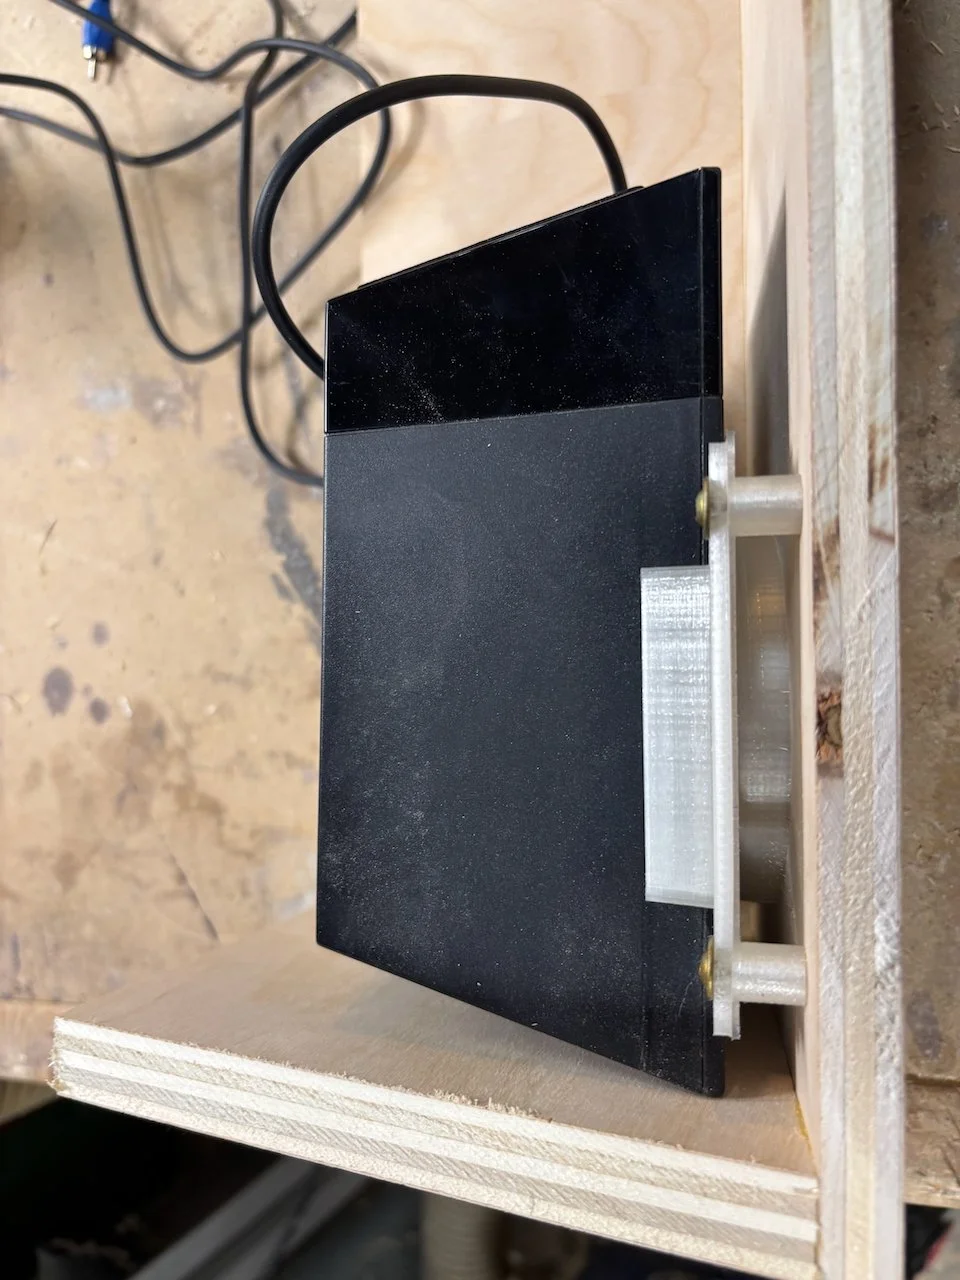
Speaker Bracket
Speaker Lamps - these are set up as the first 10 pixels on Strip 1 (plugged into H2). Pixel 0-4 are the left speaker, and 5-9 are the right. To house the speaker lamps, I printed 2 of these brackets, and 4 of these holders. This topper is built with Logitech Z533 Speakers.
Topper Lamps - these are the next 28 pixels on Strip 1 (H2). It’s two rows of 14 pixels. The first row is right to left (in the back) and the second row is left to right (in the front). I 3D print these little strip brackets to hold down the topper strips.
Ramp Lamps - these are the first 4 pixels on Strip 2 (H3) I put two pixels under each of the right ramps because the unit here has fancy ramps. These are the ramps that this machine has. Unfortunately, at the time of this article (April, 2025) they are sold out. I think you would still get some effects from putting LEDs beneath the solid ramps (there’s enough space on either side for leakage), but it wouldn’t be as good as these.
Stadium Rails - these are the next 10 pixels on Strip 2 (H3). 5 pixels for right, and then 5 for left. They’re mounted to the wood rails with 2 3-D printed rails and 4 brackets. The wiring is routed to the ramps, then to the right rail, under the apron, and to the left rail.

LED Strips on top of Topper

Left Stadium Rail

Right Stadium Rail

Fancy Ramps with LEDs underneath
Configuring the Code
You get the ALB code when you get the BK25 code from here. Just hit the Green “Code > Download Zip” and when you uncompress you’ll see a LEDAccessories folder. That contains a separate LEDAccessories.ino Arduino project with the BK25Topper code.
Depending on the number of pixels and how you install the strip lamps, you may want to change the configuration to match your build. There are some parameters in “defines” in the BK25Topper.cpp file. If you make your LED accessories with precisely the same number of pixels that I had, you don’t have to change anything. By the way, a “pixel” can have multiple LEDs on the strip. If you have a little surface mount chip every 3 LEDs, then you can count the little black chips to know how many pixels you have.
Pixels per strip - the code is currently set up for 38 pixels on strip 1 (5 for each speaker, then 14 for each row on the topper). Strip 2 has 14 pixels (two for each ramp and then 5 each for the left and right stadium rails). If you change any of those layouts, change these variables at the top of BK25Topper.cpp
#define STRIP_1_NUMBER_OF_PIXELS 38
#define STRIP_2_NUMBER_OF_PIXELS 14
Parameters for where on the strip the code expects to find topper & speakers — the left speaker starts at 0 and has 5 pixels. The right starts at 5 and has another 5. The topper strips begin at 10 and have 2 rows of 14. Adjust your defines in BKTopper.cpp as necessary (search for these lines).
#define TOP_START_PIXEL 10
#define TOP_NUM_PIXELS_PER_ROW 14
#define TOP_NUM_ROWS 2
#define LEFT_SPEAKER_START 0
#define LEFT_SPEAKER_NUM_LAMPS 5
#define RIGHT_SPEAKER_START 5
#define RIGHT_SPEAKER_NUM_LAMPS 5
Parameters for Ramps — at the moment, I coded the ramps as “GIArea==0” and “GIArea==1” so there aren’t any real defines to alter. If you don’t want the first 4 pixels of the second strip to be for ramp lights, let me know if you can’t figure out the code. I’ll adjust as necessary, but I’m not going to bother unless someone runs into a problem.
Defines for Stadium Rails:
#define GI_2_RIGHT_RAIL_START 4
#define GI_2_RIGHT_RAIL_NUM_PIXELS 5
#define GI_2_LEFT_RAIL_START 9
#define GI_2_LEFT_RAIL_NUM_PIXELS 5
Topper Enclosure

I build my topper mostly from 1/2” plywood. Only the side pieces are 3/4” so I would have more area to screw into. The front is angled at 15º down towards the player.
PDFs of parts:
Assembly: I typically glue & brad the front, sides, and bottom together. Then I install the speaker brackets and speakers inside (with speaker LEDs). I solder on the top LED strips, and then run all the signals through an 8-conductor wire (Speaker L+, Speaker L-, Speaker R+, Speaker R-, 12V, Gnd, LED Data). Finally, I attach the top and back with screws.
If you go down this path, I hope you let me know how it went!