How to Build the ALB
First, you’re going to have to get a PCB. These are way cheaper if you order 10 or 20, so it might make sense to find some friends who also want to add lighting accessories, or just buy a bunch. Depending on the current market conditions, I’ve gotten boards made and shipped to me for a $1-$2 USD, but it has been a while. Maybe the cost is different now. You can get ALB Gerber files, schematics, and EasyEDA files here.
You can get these made from JLCPCB or anywhere PCBs are printed.

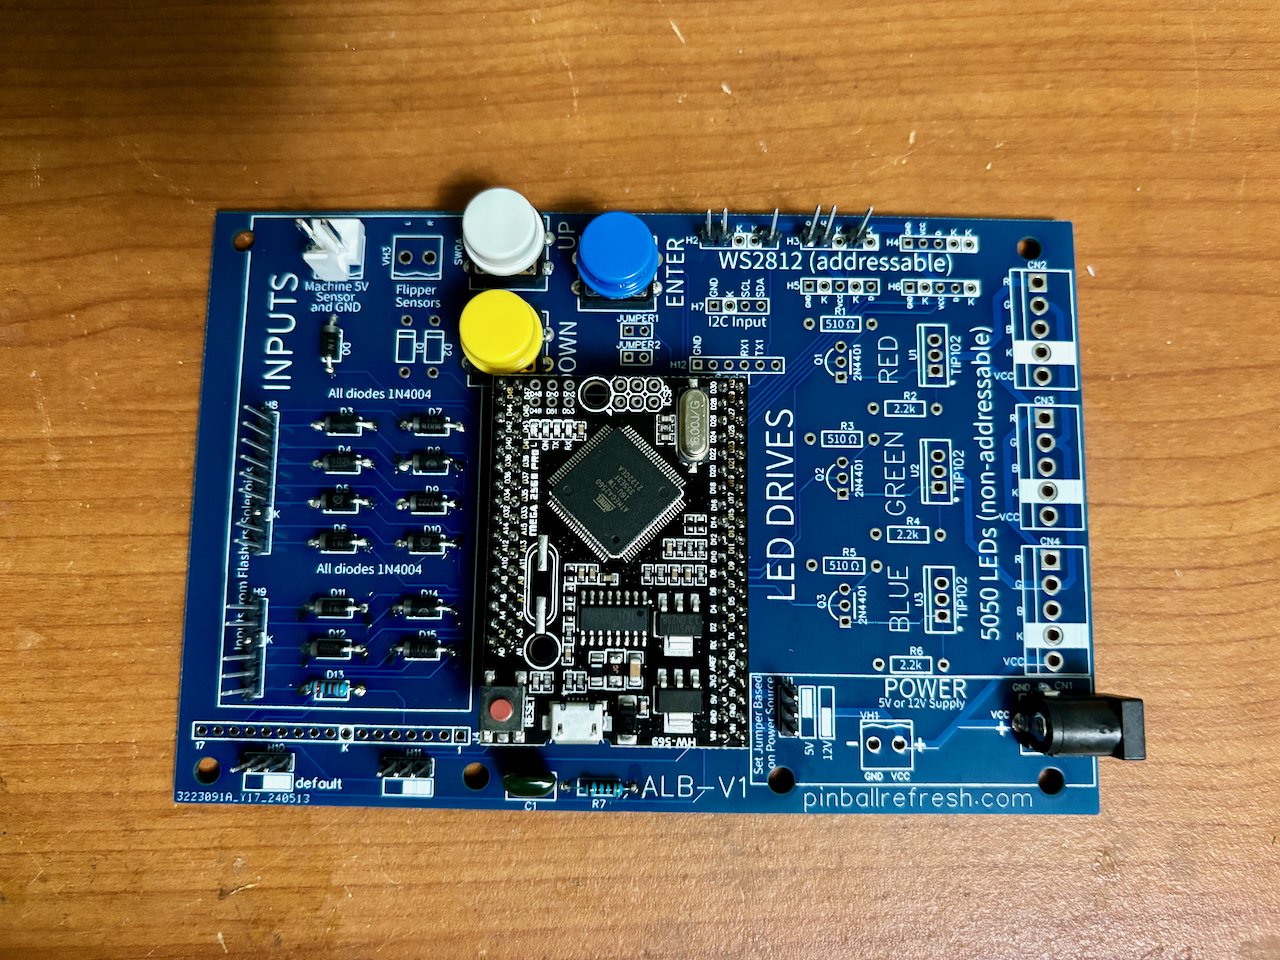
ALB PCB
Next, you’re going to have to decide which sections you need to populate. There are a couple of mandatory sections (Power & Arduino), but most use cases will only populate a couple of the other sections. See the parts list for the mandatory parts.
1) Power - the board works with 5V or 12V DC and can be powered with a barrel connector or a 2-pin header (0.156” spacing). I like to power with an off-the-shelf brick transformer that puts out 5A (see parts list) so I don’t put extra strain on the pinball machine’s power supply. You can run a separate power cord, plug into the service port, or put in a new switched outlet. The LEDs will be run from this power source, so all your LEDs should be 5V or all of them should be 12V. The jumper positions are marked on the silkscreen of the circuit board.
2) Arduino - you must get an Arduino MEGA 2560 Pro for this board. They usually come with pins. You can solder it (with the pins) directly to the board or use sockets.
3 & 4) What kind of lights do you want? This board controls three types. The addressable LEDs are a little more expensive, but very simple to hook up. They’re driven by your power supply, ground, and a single data line. With just some header pins, you can hook these up. 5050 LEDs and GI bulbs are cheap, but you need driver circuits to run them. I’ve split out three pulse-width modulated circuits that will drive Red, Green, and Blue. Each channel has two transistors and two resistors.
A) WS2811 or WS2812 addressable LED strips - in these strips each pixel is addressable. If you’re doing complex animations, get these. I like the 12V because they’re very bright.
B) 5050 LED strips - these can be really handy if want to add inexpensive lighting and don’t care about animation. Stadium or back box lights might do just fine with 5050s.
C) 12V GI lamps - there are some little 12V LEDs that are almost the same size & shape of an incandescent 44 or 47 bulb. They’re very bright. The only issue is that they have posts and don’t fit in a socket. A tiny PCB would be good to mount these if you want to use them for solid GI.
5) Inputs - the board can be triggered by a bunch of different sources.
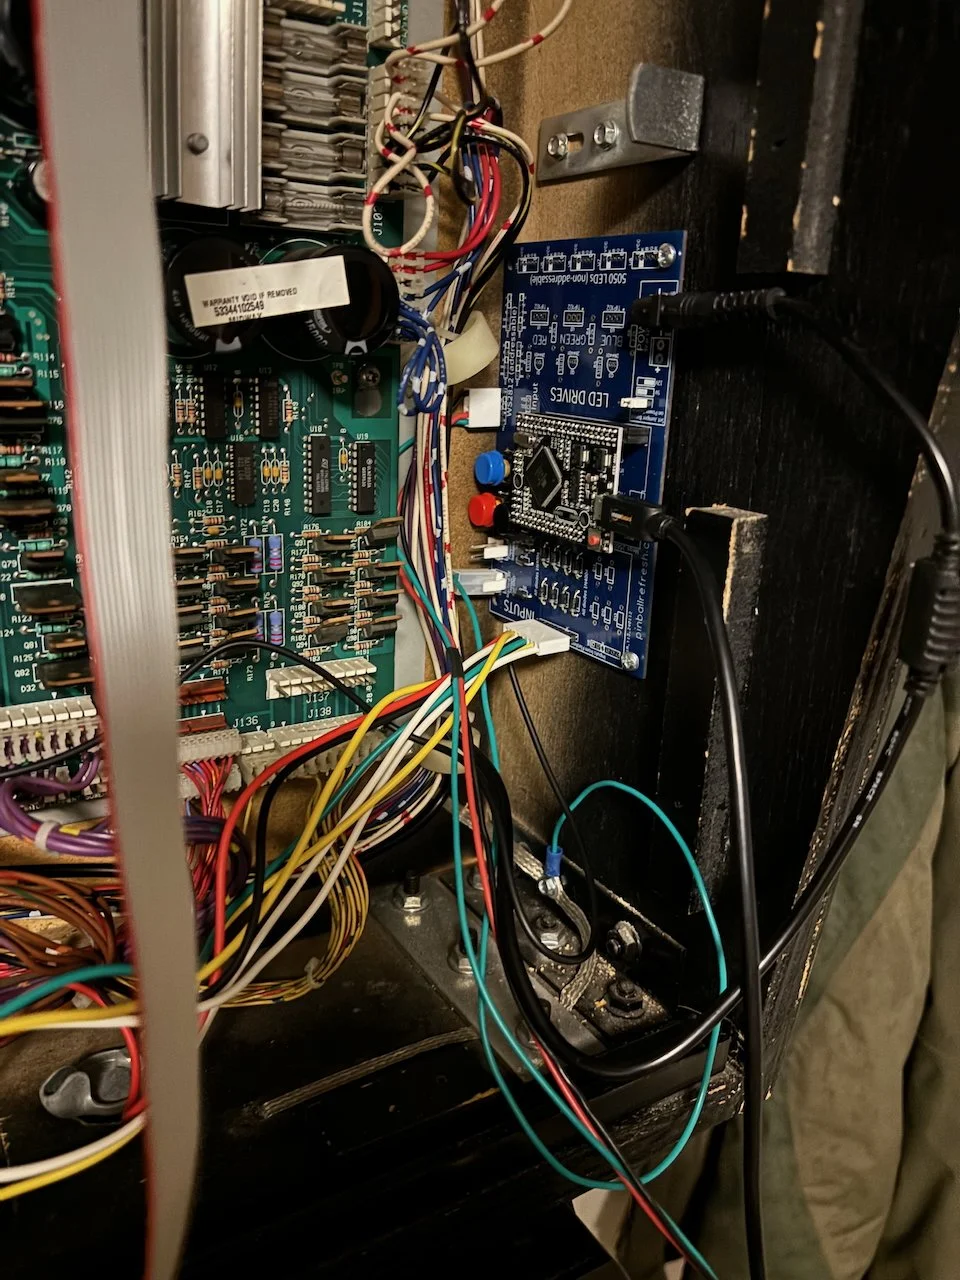
A) Solenoids & Flashers - you can hook these up to H8 and H9 for a total of 13 inputs. Each input has a blocking diode so you can cilp a lead right on a transistor and it will trigger the board on ground. I like to use alligator clip leads and wire them directly into a connector so I can clip the inputs onto the machines transistors. I label each clip in case it has to be removed and re-installed.

Harness for Solenoid / Flasher Sensor

Solenoid / Flasher Sensing
B) Flippers & Power - there are two two-pin headers at the top left of the board (0.156” Molex). One has Ground, so it should be used to establish a common ground between this board and the pinball machine. One senses 5V power. If your ALB is powered independently, it’s useful to be able to sense when the pinball machine is on or off. The other connector has leads for the right and left flipper. If your machine only has a single relay for both flippers, you only need to hook up one of these leads.
C) Lamp Sensor - on some games, you can sense the state of an individual lamp. For example, a WPC games has lamps strobed by rows and columns. You can hook up the 13th channel on the ALB (replacing D13 with a resistor) and populate R7 and C1 and then hook up other input channels to row transistors. Then the code will know the state of some of the lamps on that machine. For The Getaway, I hooked up sensors to tell when the Red, Yellow, and Green traffic signal lamps were on so I could trigger animations based on those.
D) J1 of a Bally/Stern game. For machines that used a Stern MPU100 or MPU200, or a Bally AS-2518-17 or - 35, the lamp board can be replaced with an ALB. Then you replace the feature lamps on your machine with addressable LEDs.
6) Buttons - I put spots for 3 physical buttons on the board. This is helpful for testing and to have an on-board way to change brightness of different channels/animations.